
Technique · Upgrading Your Vise
You Upgraded to the New Standard Vise. Now Unlearn Everything About Clamping Force.
The new Standard Vise is a fundamentally different tool. Customers who treat it like the old one are bending jaws. Here's how to use it correctly.
If you've been sharpening with the original Standard Vise for years, you've built muscle memory around clamping force. The old vise held knives through grip alone — tighten down, test the handle, add more force if it moves. That approach worked. But the new Standard Vise doesn't work that way, and carrying those habits over is the fastest way to permanently damage your new jaws.
Key Takeaways
- →The new vise holds knives through contact and conformity, not clamping force. Far less torque is needed than you're used to.
- →Five contact points cradle the blade — two pads per side plus the Blade Stop below. Over-tightening works against this system and risks bending the flexible jaws.
- →Always use the Blade Stops. They are what allow the jaws to do their job with minimal force.
- →The correct clamping procedure: tighten to contact, then add exactly one half turn more.
- →Never test knife security by wiggling the handle. Test at the spine, just ahead of the jaws.
- →If the blade moves during sharpening, add force incrementally — a small fraction of a turn at a time.
What Makes the New Vise Different
The original Standard Vise was a workhorse. It held knives reliably, but it did so through clamping force alone — essentially gripping the blade hard enough that it couldn't move. If the knife shifted, the answer was always to tighten more.
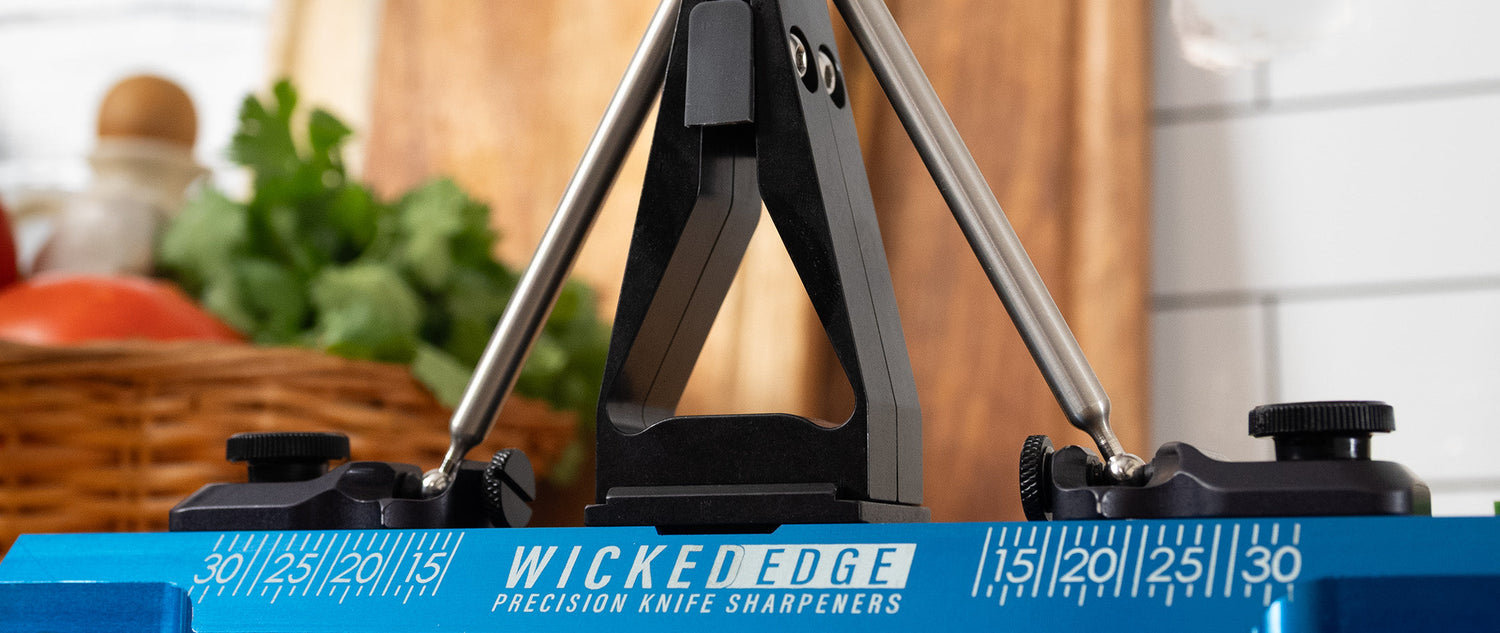
The new Standard Vise is built around a different idea entirely. The jaws are flexible and lean slightly inward, conforming to the geometry of the blade rather than simply squeezing it. A self-centering design keeps the knife positioned evenly in the machine so bevels stay consistent on both sides. And the dual-vise system allows the jaws to twist slightly along a tapered blade, maximizing contact all the way to the tip.
Critically, the system includes Blade Stops — physical stops below the blade that prevent it from sliding downward or pivoting front to back under sharpening pressure. The jaws lean in and downward, pressing the knife into the Blade Stop to lock it from multiple directions at once. The result is a blade held at five contact points: two full-contact pads on each side, and the Blade Stop below.
This design excels with full flat ground blades and knives with significant distal taper — blade geometries that were always tricky to clamp securely in the original vise.
How to Clamp with the New Vise
Four habits to build from the start
Always use the Blade Stops. This isn't optional. The Blade Stops prevent the knife from tipping front to back and from sliding downward while you sharpen. They're also what allows the jaws to work with minimal clamping force. If you're sharpening a small blade, use the extra-tall Blade Stop to position it higher in the vise for lower sharpening angles.
Tighten to contact, then one half turn more. Turn the screws until the jaws just make contact with the blade — you'll feel the resistance change. Then go exactly one half turn past that point. Stop there. Resist the urge to keep going. That's all the force this vise needs.
Test security at the spine, not the handle. Do not test the knife by wiggling the handle. The mechanical leverage of a knife handle is enormous — even a perfectly clamped blade will appear to shift if you push the handle, which leads to overtightening. Instead, pinch the spine of the blade from below, right in front of the jaws, and try to move it. If it takes any real effort, the knife is secure.
Add force incrementally during sharpening, only if needed. If the blade starts to move mid-session, add only a small fraction of a turn at a time. In most cases you won't need to adjust at all — if the knife is moving, check that the Blade Stops are engaged before reaching for the screws.
Upgrader FAQ
Why do the new vise jaws feel like they might bend if I tighten them?
Because they will — if you over-tighten. The flexibility of the new jaws is a feature, not a weakness. That flex is what allows them to conform to the blade's geometry and create the contact-based hold the system relies on. Applying the same force you used on the old vise can permanently deform them. Tighten to contact plus a half turn, and you'll never have this problem.
The knife feels less locked in than it did with the old Standard Vise. Is that normal?
Test it correctly before deciding. Wiggling the handle will always make the knife feel loose regardless of how well it's clamped — the leverage is too strong. Pinch the spine just ahead of the jaws instead. If the blade resists movement, it's secure. The new vise holds the knife differently than the old one, but it holds it just as well.
Do I need to use the Blade Stops every time?
Yes. The Blade Stops are doing meaningful work in the new system — they're not just a convenience feature. They prevent the knife from pivoting or sliding under lateral sharpening pressure, and they're what allows the jaws to function with less clamping force. Skipping them shifts the load entirely onto the jaws and increases the risk of both jaw damage and inconsistent sharpening.
What blade types benefit most from the new Standard Vise design?
The new Standard Vise particularly excels with full flat ground blades and knives with significant distal taper — blade types that were often challenging to seat evenly in the original vise. The conforming jaws and self-centering design handle these geometries with consistency that wasn't previously possible in this vise format.
How much clamping force does the new Standard Vise need?
Much less than the original vise. Tighten the screws until the jaws make contact with the blade, then go exactly one half turn past that point. The new vise holds knives through five contact points — two conforming pads on each side of the blade plus the Blade Stop below — rather than through grip strength alone.
The new Standard Vise is a better tool — but it rewards a different approach. The old instinct to add more force when something doesn't feel secure is exactly the wrong response here. Trust the contact points, use the Blade Stops, and test at the spine.
Once those habits are in place, you'll find the new vise faster to set up, more consistent across different blade geometries, and more capable on the knives that used to give you trouble.
If you have questions about the setup or your specific knife, our support team is happy to help — reach out anytime.
Sharpening flexible blades like fillet or boning knives? The Blade Stabilizer — Standard Vise is purpose-built to eliminate blade deflection and is fully compatible with the new vise.